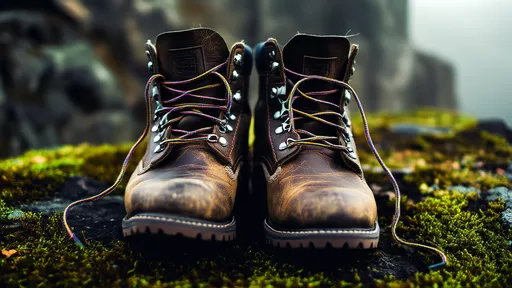
There is an art to lacing up hiking boots that many outdoor enthusiasts overlook in their haste to hit the trail. We meticulously research gear, plan routes, and pack essentials, yet often default to the same basic crisscross pattern we learned as children. However, the way you tie your boots can dramatically influence comfort, stability, and foot health over long distances and challenging terrain. It’s not merely about preventing a loose lace; it’s about engineering a precise, supportive fit for your unique foot shape and the specific demands of your hike.
The fundamental principle behind segmented lacing, or zone lacing, is the understanding that your foot is not a uniform block. The instep, the midfoot, the heel, and the toe box each have different requirements for pressure and mobility. A single tension applied throughout the entire lacing system inevitably creates pressure points in some areas while leaving others inadequately secured. This can lead to a host of problems, from simple hot spots and blisters to more debilitating issues like bruised toenails on descents or a lack of ankle support on uneven ground. The goal, therefore, is to move beyond a one-tension-fits-all approach and create a customized fit that addresses the needs of each segment of your foot independently.
Before delving into specific techniques, a proper foundation is crucial. Begin by ensuring your heel is seated fully back in the boot's heel cup. This is the single most important step for preventing slippage and blisters. Slide your foot forward until your toes gently touch the front, then lock your heel in place by pushing it down and back as you pull the laces snug over the instep. This heel-lock technique is the cornerstone of any effective lacing system and should be your starting point before applying any segmented adjustments.
For those who suffer from pressure on the top of the foot, often caused by a high instep or a prominent navicular bone, a simple skip-lace technique can provide immediate relief. Instead of crisscrossing every set of eyelets, simply run the lace straight up on the outside of the pressure point, bypassing one or two sets of eyelets before crossing over. This creates a window of openness directly over the sensitive area, redistributing the pressure to the less sensitive areas above and below. It’s a remarkably simple modification that can transform a painfully tight boot into a comfortable one.
A narrow heel swimming in a wide ankle collar is a common frustration that leads to excessive heel lift, the primary cause of blisters on the back of the heel. The remedy is the classic heel-lock lacing, also known as a runner's loop. To create this, after lacing up to the second-to-top eyelet, take each lace and run it through the opposite top eyelet from the inside, forming a loop. Then, cross the ends of the laces and thread them through these newly formed loops before tying your standard bow. This creates a powerful cinching mechanism that pulls the boot's collar down and back, effectively cradling your heel and eliminating vertical movement without overtightening the rest of the boot.
Descending steep, technical trails places immense strain on your feet, with your toes jammed relentlessly into the front of your boots. This can lead to blackened toenails and considerable discomfort. To mitigate this, focus on creating a vice-like grip around your midfoot and ankle while keeping the toe box relatively loose. Lace the bottom third of your boot snugly but not tightly to allow your toes to splay naturally. Then, as you move up to the midfoot eyelets, pull the laces significantly tighter. This technique anchors your foot firmly in the boot, preventing it from sliding forward during descents. The tight midfoot section acts as a brake, stopping your foot's momentum before your toes can crash into the front.
Conversely, on long, arduous ascents, the primary need is for secure footing and efficient energy transfer without constricting circulation. A tight toe box can cause cramping and fatigue over time. For uphill efficiency, employ a lacing strategy that is uniformly snug but avoids any extreme pinching. Some hikers prefer a slightly looser fit around the ankle to allow for a more natural flex with each step, while maintaining a secure fit around the instep to prevent any side-to-side rocking. The key is consistent, even pressure that holds your foot securely without creating any specific points of contention that will drain your energy over miles of climbing.
The type of laces you use is not a mere detail; it is integral to the success of any lacing strategy. Round, slick nylon laces are notorious for coming untied and failing to hold tension effectively. Flat woven laces, often made from polyester or a similar material, provide far greater surface area and friction, allowing them to hold knots better and maintain the precise tension you set in each zone. They are less prone to stretching throughout the day, ensuring the custom fit you engineered at the trailhead remains intact mile after mile. Always carry a spare set of laces in your pack; a broken lace can swiftly downgrade a premium boot into a useless liability.
The final and most critical step is, of course, the knot. The humble shoelace knot, or reef knot, is sufficient for a casual stroll but is notoriously unreliable under the variable pressures and vibrations of hiking. It has a tendency to work itself loose. For absolute security, employ a double knot or, better yet, learn the Ian's Secure Knot or a Surgeon’s Knot. These knots utilize extra loops and twists to create immense friction, effectively locking the tension in place. They are designed to withstand the jostling and tugging of a long day on the trail, giving you peace of mind that your meticulously calibrated fit won’t come undone at a crucial moment.
Mastering the segmentation of your laces transforms your hiking boots from a generic piece of equipment into a custom-tailored tool. It requires a few minutes of thoughtful experimentation at the trailhead, a willingness to listen to the feedback from your feet, and an understanding that a dynamic environment demands a dynamic fit. The payoff is profound: feet that feel fresher at the end of the day, a significant reduction in foot-related injuries, and the confidence that your connection to the trail is as secure and responsive as it can possibly be. It is one of the simplest, most cost-free performance upgrades any hiker can make.

By /Aug 26, 2025

By /Aug 26, 2025

By /Aug 26, 2025

By /Aug 26, 2025

By /Aug 26, 2025

By /Aug 26, 2025
By /Aug 26, 2025

By /Aug 26, 2025

By /Aug 26, 2025

By /Aug 26, 2025

By /Aug 26, 2025

By /Aug 26, 2025

By /Aug 26, 2025

By /Aug 26, 2025

By /Aug 26, 2025

By /Aug 26, 2025

By /Aug 26, 2025

By /Aug 26, 2025

By /Aug 26, 2025

By /Aug 26, 2025